
his is a very common question asked by any terraform beginner
I have a bunch of existing cloud resources(AWS in this case) created either
- Manually(AWS GUI)
- Boto3
- CloudFormation
How to make those resources as a part of Terraform Configuration(tf and state file)?
Unfortunately, there is no good/better way to do that, I listed out a few options to make that thing possible but none of them is straightforward and requires a lot of manual effort. If you are aware of any other way to achieve this please let me know :-).
Solution 1: Terraform import command
Terraform import command is able to import existing infrastructure. This allows you to take resources you’ve created by some other means and bring it under Terraform management.
This is a great way to slowly transition infrastructure to terraform.
To import a resource (eg: instance i-082efb265ed372cc5) , which is created manually using AWS Console, first write a resource block for it in your own terraform configuration establishing the name by which it will be known to Terraform

main.tf
provider "aws" {
  region = "us-west-2"
}

resource "aws_instance" "import_test" {
  ami = "${var.aws_ami}"
  instance_type = "${var.instance_type}"
  key_name = "${var.key_name}"
  tags {
    name = "test-instance"
  }
}
variables.tf
variable "aws_ami" {
  default = "ami-032509850cf9ee54e"
}

variable "instance_type" {
  default = "t2.micro"
}

variable "key_name" {
  default = "my-test-key"
}
terraform import [options] ADDR ID
Where:
- ADDR is the address of your Terraform’s defined resource to import to.
- ID is your AWS object ID
Now terraform import can be run to attach an existing instance to this resource configuration
$ terraform import aws_instance.import_test i-082efb265ed372cc5
aws_instance.import_test: Importing from ID "i-082efb265ed372cc5"...
aws_instance.import_test: Import complete!
 Imported aws_instance (ID: i-082efb265ed372cc5)
aws_instance.import_test: Refreshing state... (ID: i-082efb265ed372cc5)

Import successful!

The resources that were imported are shown above. These resources are now in
your Terraform state and will henceforth be managed by Terraform.
What this command will do is locate the AWS instance with instance id i-082efb265ed372cc5(which has been created outside terraform) and attach its existing settings as described by the EC2 API to the name aws_instance.import_test in the Terraform state.
As a result of the above command, the resource is recorded in the state file. We can now run a terraform plan to see how the configuration compares to the imported resource, and make any adjustments to the configuration to align with the current (or desired) state of the imported object.
$ terraform plan
Refreshing Terraform state in-memory prior to plan...
The refreshed state will be used to calculate this plan, but will not be
persisted to local or remote state storage.

aws_instance.import_test: Refreshing state... (ID: i-082efb265ed372cc5)

------------------------------------------------------------------------

An execution plan has been generated and is shown below.
Resource actions are indicated with the following symbols:
 ~ update in-place

Terraform will perform the following actions:

 ~ aws_instance.import_test
 tags.Name: "test-instance" => ""
 tags.name: "" => "test-instance"


Plan: 0 to add, 1 to change, 0 to destroy.

------------------------------------------------------------------------

Note: You didn't specify an "-out" parameter to save this plan, so Terraform
can't guarantee that exactly these actions will be performed if
"terraform apply" is subsequently run.
State – terraform.tfstate
Terraform must store state about your managed infrastructure and configuration. This state is used by Terraform to map real world resources to our configuration, keep track of metadata, and to improve performance for large infrastructures.
This state is stored by default in a local file named terraform.tfstate.
Terraform uses this local state to create plans and make changes to our infrastructure. Before any terraform operation, Terraform does a refresh to update the state with the real infrastructure.
Reference
https://www.terraform.io/docs/import/
https://www.terraform.io/docs/state/
Solution 2: Terraforming
One of the major drawbacks with the above solution is that terraform does not support how to generate the resource code automatically. We will have to manually define them before performing the import command. It’s time-consuming and might cause a problem by human error such as writing invalid syntax, putting wrong object id, etc.
To make our life easier there is a tool called Terraforming it’s a free and open-source tool written in Ruby. It helps you to export existing AWS resources to Terraform style (tf, tfstate).
Currently, Terraforming requires Ruby 2.3 and supports Terraform v0.9.3 or higher. You can install Terraforming by gem command.
Installation
gem install terraforming
Terraforming command usage
Terraforming supports to export many types of AWS resource. For example EC2 instances, Security Group, Route53, VPC, IAM, etc. You can see the full list of supported options by running
$ terraforming
Commands:
  terraforming alb             # ALB
  terraforming asg             # AutoScaling Group
  terraforming cwa             # CloudWatch Alarm
  terraforming dbpg            # Database Parameter Group
  terraforming dbsg            # Database Security Group
  terraforming dbsn            # Database Subnet Group
  terraforming ddb             # DynamoDB
  terraforming ec2             # EC2
  terraforming ecc             # ElastiCache Cluster
  terraforming ecsn            # ElastiCache Subnet Group
  terraforming efs             # EFS File System
  terraforming eip             # EIP
  terraforming elb             # ELB
  terraforming help [COMMAND]  # Describe available commands or one specific command
  terraforming iamg            # IAM Group
  terraforming iamgm           # IAM Group Membership
  terraforming iamgp           # IAM Group Policy
  terraforming iamip           # IAM Instance Profile
  terraforming iamp            # IAM Policy
  terraforming iampa           # IAM Policy Attachment
  terraforming iamr            # IAM Role
  terraforming iamrp           # IAM Role Policy
  terraforming iamu            # IAM User
  terraforming iamup           # IAM User Policy
  terraforming igw             # Internet Gateway
  terraforming kmsa            # KMS Key Alias
  terraforming kmsk            # KMS Key
  terraforming lc              # Launch Configuration
  terraforming nacl            # Network ACL
  terraforming nat             # NAT Gateway
  terraforming nif             # Network Interface
  terraforming r53r            # Route53 Record
  terraforming r53z            # Route53 Hosted Zone
  terraforming rds             # RDS
  terraforming rs              # Redshift
  terraforming rt              # Route Table
  terraforming rta             # Route Table Association
  terraforming s3              # S3
  terraforming sg              # Security Group
  terraforming sn              # Subnet
  terraforming snss            # SNS Subscription
  terraforming snst            # SNS Topic
  terraforming sqs             # SQS
  terraforming vgw             # VPN Gateway
  terraforming vpc             # VPC

Options:
  [--merge=MERGE]                                # tfstate file to merge
  [--overwrite], [--no-overwrite]                # Overwrite existing tfstate
  [--tfstate], [--no-tfstate]                    # Generate tfstate
  [--profile=PROFILE]                            # AWS credentials profile
  [--region=REGION]                              # AWS region
  [--assume=ASSUME]                              # Role ARN to assume
  [--use-bundled-cert], [--no-use-bundled-cert]  # Use the bundled CA certificate from AWS SDK
Export AWS resource into tf
Following is an example of exporting existing EC2 instances
$ terraforming ec2
resource "aws_instance" "test-instance" {
    ami                         = "ami-032509850cf9ee54e"
    availability_zone           = "us-west-2a"
    ebs_optimized               = false
    instance_type               = "t2.micro"
    monitoring                  = false
    key_name                    = "my-test-key"
    subnet_id                   = "subnet-f3e4988a"
    vpc_security_group_ids      = ["sg-052d06581ff7fd432"]
    associate_public_ip_address = false
    private_ip                  = "172.31.29.96"
    source_dest_check           = true

    root_block_device {
        volume_type           = "gp2"
        volume_size           = 8
        delete_on_termination = true
    }

    tags {
        "Name" = "test-instance"
    }
}
Once we have tf code definitions above, we can copy paste them into our terraform code.
Create main.tf file and copy the above code
provider "aws" {
 region = "us-west-2"
}
resource "aws_instance" "test-instance" {
    ami                         = "ami-032509850cf9ee54e"
    availability_zone           = "us-west-2a"
    ebs_optimized               = false
    instance_type               = "t2.micro"
    monitoring                  = false
    key_name                    = "my-test-key"
    subnet_id                   = "subnet-f3e4988a"
    vpc_security_group_ids      = ["sg-052d06581ff7fd432"]
    associate_public_ip_address = false
    private_ip                  = "172.31.29.96"
    source_dest_check           = true

    root_block_device {
        volume_type           = "gp2"
        volume_size           = 8
        delete_on_termination = true
    }

    tags {
        "Name" = "test-instance"
    }
}
Similar to Solution 1 we need to attach an existing instance to this resource configuration
$ terraform import aws_instance.test-instance i-082efb265ed372cc5
aws_instance.test-instance: Importing from ID "i-082efb265ed372cc5"...
aws_instance.test-instance: Import complete!
 Imported aws_instance (ID: i-082efb265ed372cc5)
aws_instance.test-instance: Refreshing state... (ID: i-082efb265ed372cc5)

Import successful!

The resources that were imported are shown above. These resources are now in
your Terraform state and will henceforth be managed by Terraform.
Now we can confirm the new resource definition by running terraform plan.
$ terraform plan
Refreshing Terraform state in-memory prior to plan...
The refreshed state will be used to calculate this plan, but will not be
persisted to local or remote state storage.

aws_instance.test-instance: Refreshing state... (ID: i-082efb265ed372cc5)

------------------------------------------------------------------------

No changes. Infrastructure is up-to-date.

This means that Terraform did not detect any differences between your
configuration and real physical resources that exist. As a result, no
actions need to be performed.
NOTE: If terraform doesn’t show any changes to AWS infrastructure, it means our imported resource is successful.
The same step needs to be performed for any other resources
$ terraforming sg
resource "aws_security_group" "vpc-061fe159b3de2c515-agatrainWebSG" {
    name        = "agatrainWebSG"
    description = "webserver sec group"
    vpc_id      = "vpc-061fe159b3de2c515"

    ingress {
        from_port       = 80
        to_port         = 80
        protocol        = "tcp"
        cidr_blocks     = ["0.0.0.0/0"]
        ipv6_cidr_blocks     = ["::/0"]
    }

    ingress {
        from_port       = 22
        to_port         = 22
        protocol        = "tcp"
        cidr_blocks     = ["0.0.0.0/0"]
        ipv6_cidr_blocks     = ["::/0"]
    }

    ingress {
        from_port       = 3306
        to_port         = 3306
        protocol        = "tcp"
        security_groups = []
        self            = true
    }


    egress {
        from_port       = 0
        to_port         = 0
        protocol        = "-1"
        cidr_blocks     = ["0.0.0.0/0"]
    }

    tags {
        "Name" = "mytestsg"
    }
}
Reference
https://github.com/dtan4/terraforming
Solution3: Converting CloudFormation Code to Terraform
Let’s say you have an existing CloudFormation code which you want to convert into terraform
Sample CloudFormation Code
https://s3-us-west-2.amazonaws.com/cloudformation-templates-us-west-2/EC2InstanceWithSecurityGroupSample.template
wget https://s3-us-west-2.amazonaws.com/cloudformation-templates-us-west-2/EC2InstanceWithSecurityGroupSample.template
mv EC2InstanceWithSecurityGroupSample.template example-stack.json
To Create a CloudFormation Stack
aws cloudformation create-stack --template-body file://example-stack.json \ —stack-name Cloudformation-to-terraform
Get the CloudFormation Stack response
$ aws cloudformation describe-stacks --stack-name Cloudformation-to-terraform
{
 "Stacks": [
 {
 "StackId": "arn:aws:cloudformation:us-west-2:188140964824:stack/Cloudformation-to-terraform/1c3b5ad0-9eb2-11e9-b9f3-0242fa89e25c",
 "DriftInformation": {
 "StackDriftStatus": "NOT_CHECKED"
 },
 "Description": "AWS CloudFormation Sample Template EC2InstanceWithSecurityGroupSample: Create an Amazon EC2 instance running the Amazon Linux AMI. The AMI is chosen based on the region in which the stack is run. This example creates an EC2 security group for the instance to give you SSH access. **WARNING** This template creates an Amazon EC2 instance. You will be billed for the AWS resources used if you create a stack from this template.",
 "Parameters": [
 {
 "ParameterValue": "terraform-plakhera",
 "ParameterKey": "KeyName"
 },
 {
 "ParameterValue": "0.0.0.0/0",
 "ParameterKey": "SSHLocation"
 },
 {
 "ParameterValue": "t2.small",
 "ParameterKey": "InstanceType"
 }
 ],
 "Tags": [],
 "Outputs": [
 {
 "Description": "InstanceId of the newly created EC2 instance",
 "OutputKey": "InstanceId",
 "OutputValue": "i-0723c8aa2ca4385eb"
 },
 {
 "Description": "Public IP address of the newly created EC2 instance",
 "OutputKey": "PublicIP",
 "OutputValue": "54.184.166.37"
 },
 {
 "Description": "Availability Zone of the newly created EC2 instance",
 "OutputKey": "AZ",
 "OutputValue": "us-west-2c"
 },
 {
 "Description": "Public DNSName of the newly created EC2 instance",
 "OutputKey": "PublicDNS",
 "OutputValue": "ec2-54-184-166-37.us-west-2.compute.amazonaws.com"
 }
 ],
 "EnableTerminationProtection": false,
 "CreationTime": "2019-07-04T23:19:02.785Z",
 "StackName": "Cloudformation-to-terraform",
 "NotificationARNs": [],
 "StackStatus": "CREATE_COMPLETE",
 "DisableRollback": false,
 "RollbackConfiguration": {
 "RollbackTriggers": []
 }
 }
 ]
}
- Save the output to a file Cloudformation-to-terraform
Install a tool called cf-to-tf https://github.com/humanmade/cf-to-tf
npm i -g @humanmade/cf-to-tfbrew install json2hcl- Run this command
$ cf-to-tf --stack - config < Cloudformation-to-terraform  |json2hcl | cf-to-tf clean-hcl | terraform fmt -
resource "aws_cloudformation_stack" "main" {
  name             = "Cloudformation-to-terraform"
  disable_rollback = false

  parameters = {
    KeyName      = "terraform-plakhera"
    SSHLocation  = "0.0.0.0/0"
    InstanceType = "t2.small"
  }

  tags = {}
}
NOTE: It does not generate terraform configuration for the individual resource CloudFormation provisions, it generates an aws_cloudformation_stack resource so that you can manage your existing CloudFormation stacks with Terraform instead of or in conjunction with the AWS Console and CLI.
In case if you are getting this error “I get the error unable to parse JSON: 1:13: illegal char illegal"
https://github.com/humanmade/cf-to-tf/issues/8
NOTE: I found this tool buggy as it doesn’t import all of my resources
CloudFormer is not a Solution it’s just a one more tool I want to mention if anyone is already aware of CloudFormation.
Cloudformer
What is AWS CloudFormer ?
AWS CloudFormer is a template creation tool and it creates AWS CloudFormation template from your existing resources in AWS account. We can select any supported AWS resources that are running in our account, and CloudFormer creates a template in an Amazon S3 bucket.
01. Go to AWS management console which is these resources reside.
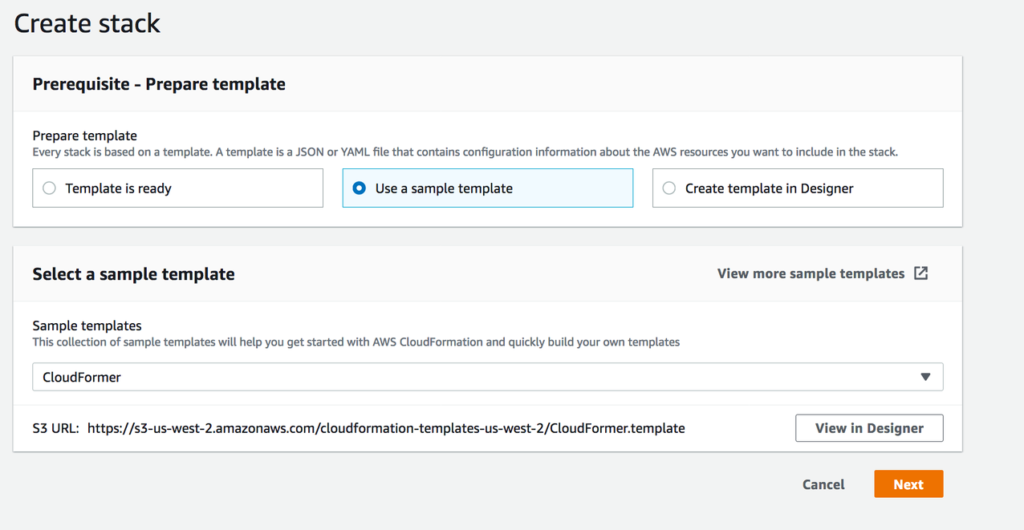
02. Go to CloudFormation service in AWS management console and click on Launch CloudFormer.
03. Choose select a sample template and select CloudFormer from the drop down. Go Next
04. Give a Name, User name and Password and select CreateNewVPC from VPC Selection drop down list.
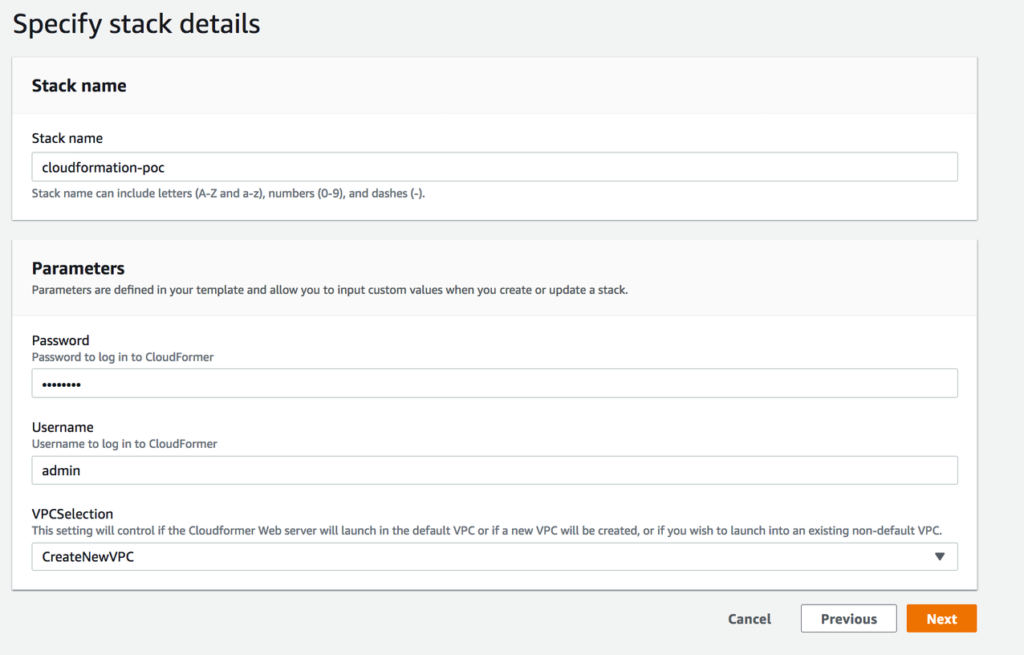
05. Keep remaining values as default in the wizard and complete with review.
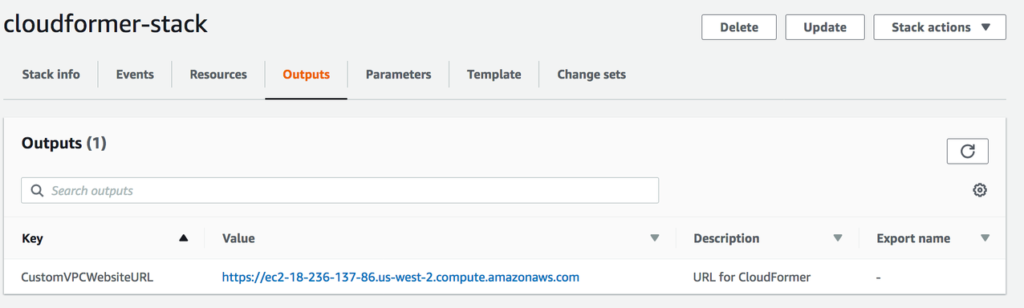
Now You can see new EC2 instance is creating under EC2 service dashboard. Your CloudFormer template will be implement inside the EC2 instance. Once EC2 creation is completed, You can access the template using public DNS of EC2.
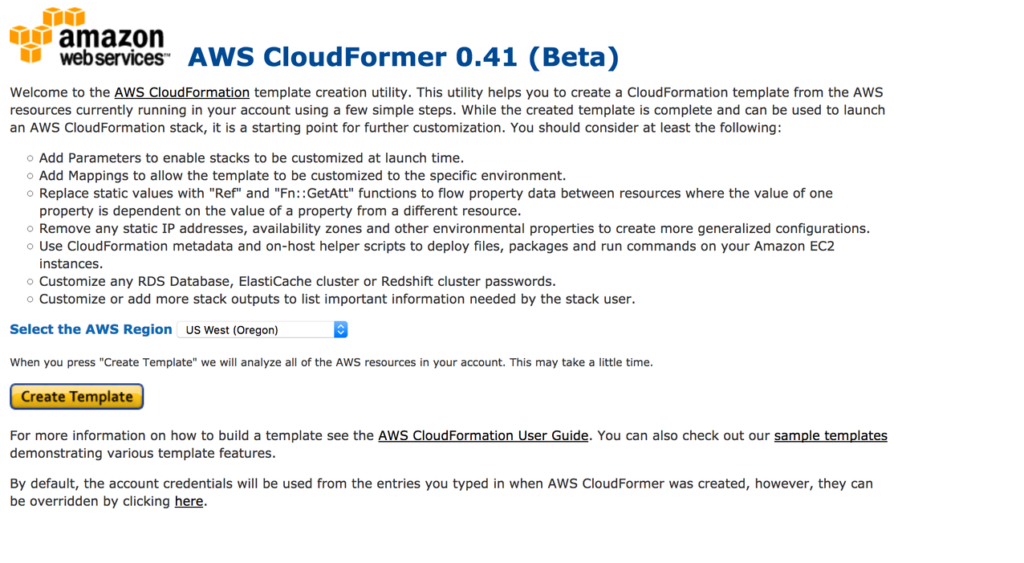
06. Select the cloudFormer EC2 instance and copy the public DNS. paste into your browser with https://<publicDNS>. You will redirect to this page. Then select your AWS region from the drop down and click on Create Template.
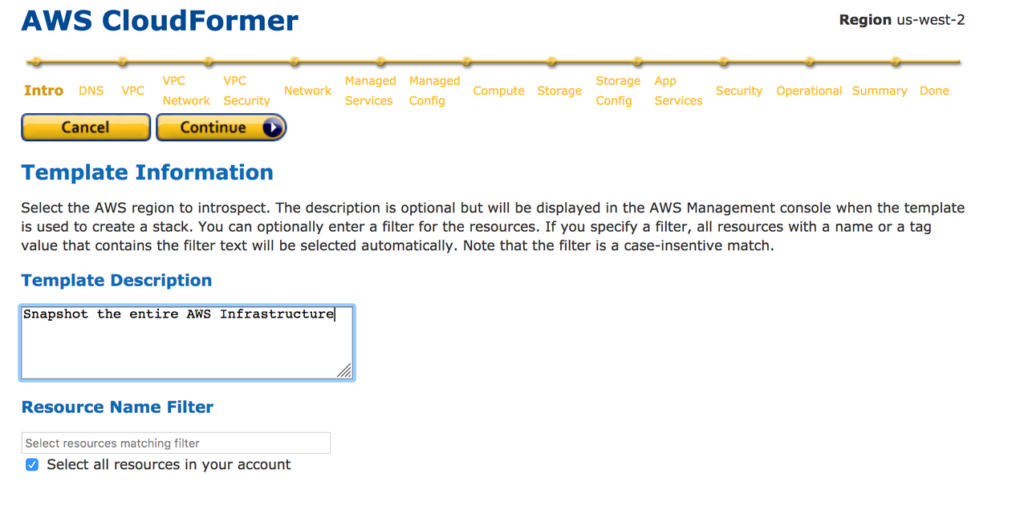
7: In the next window called Template Information, You have to enter Template info like Template description. Enter those details and click continue.
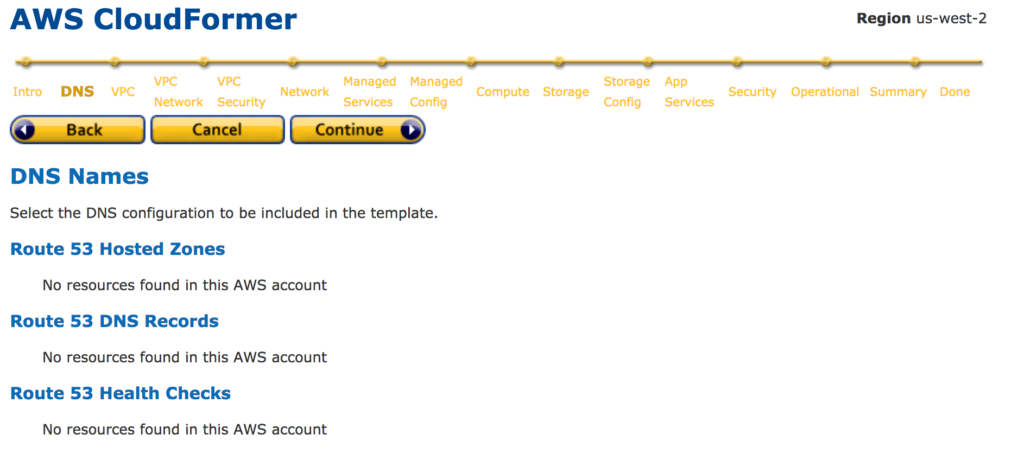
08. Select DNS Name if you have them in your VPC in the next window.
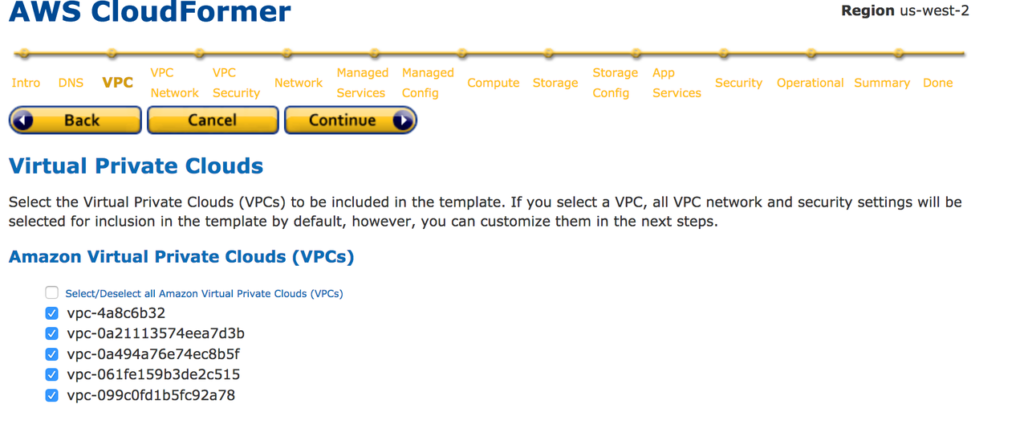
09. Select the VPC which you need to include in CloudFormation Template. Here onwards you will see only resources belong to the selected VPCs.
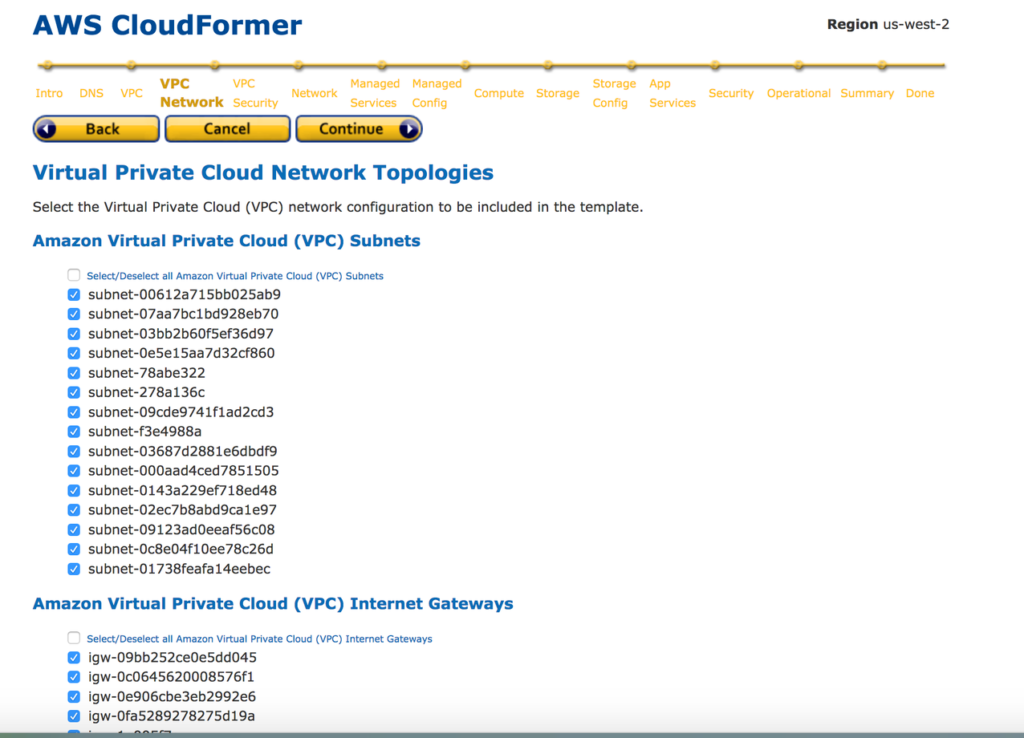
10. Select Subnets and Internet Gateway you need to add to the cloud formation template.
11. Select Access Control Lists(ACL) and Route tables you need to include CloudFormation template.
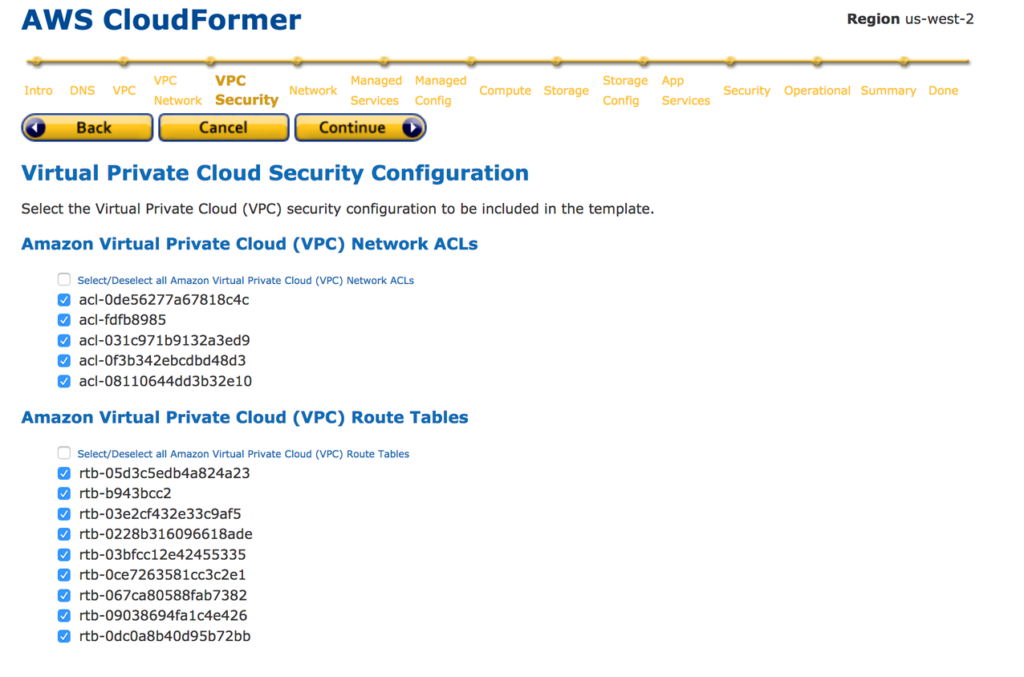
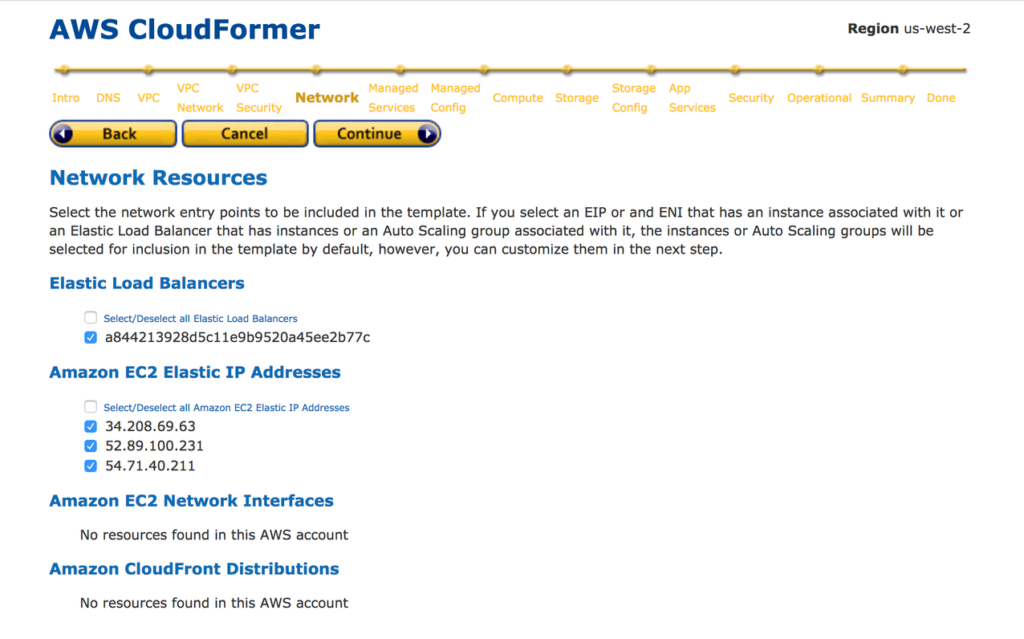
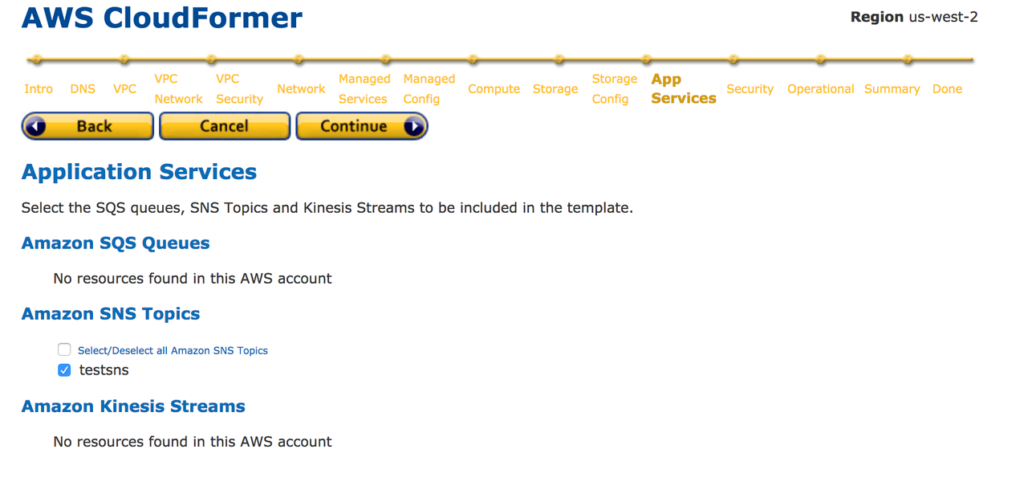
12. Select Elastic IPs and other managed services you need to add into the CloudFormation template
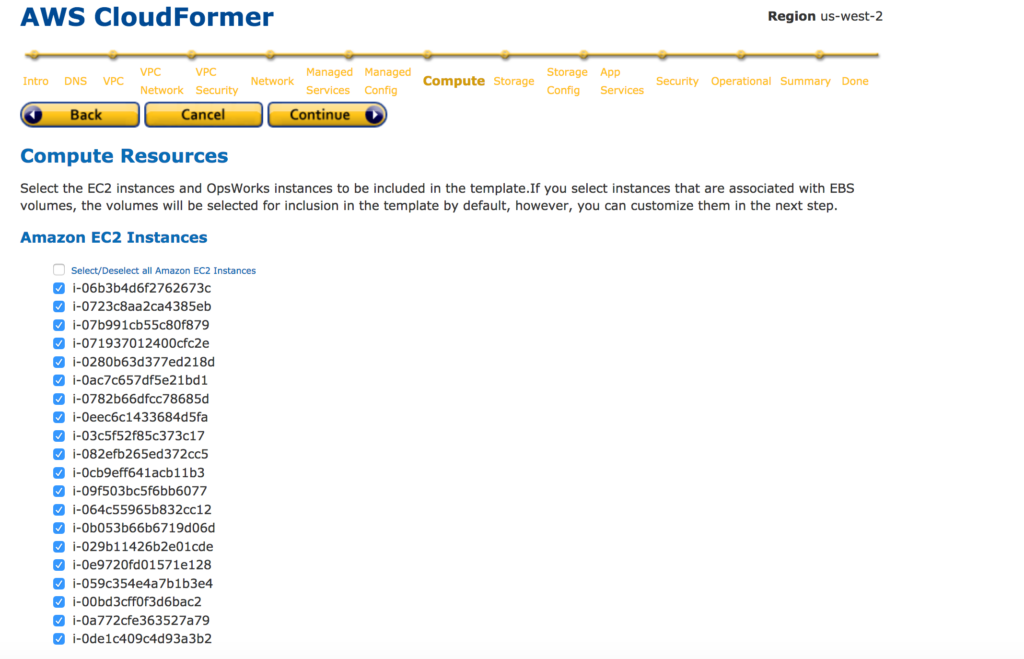
13: Select EC2 instances you need to add to the CloudFormation template.
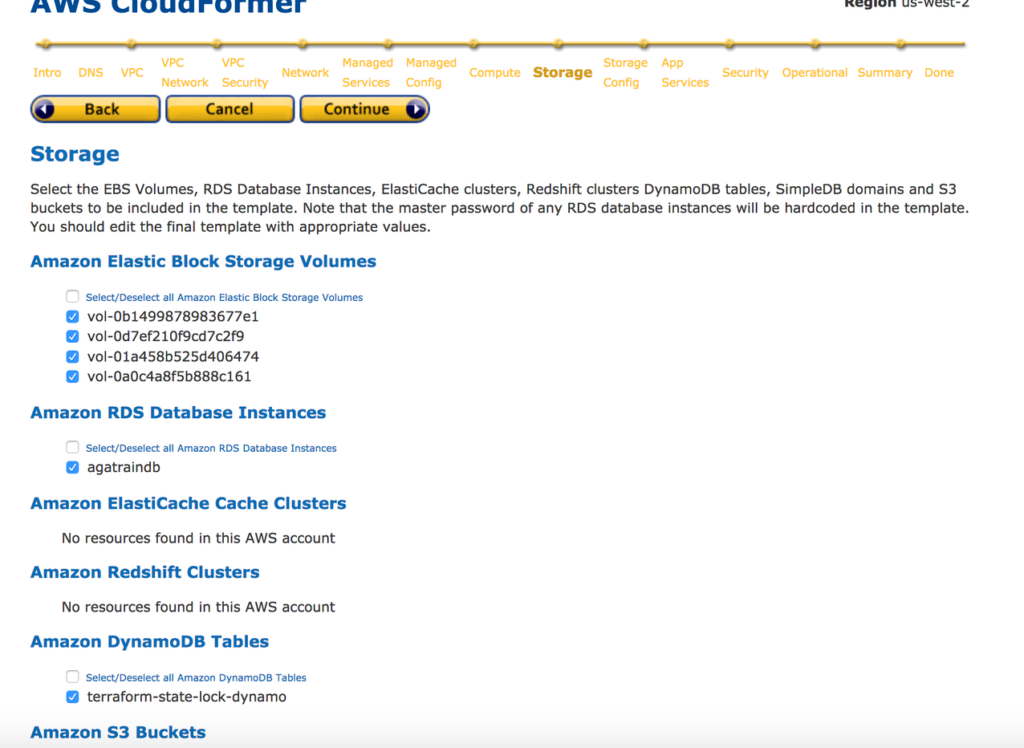
14. Select Storage related services and application services from the next steps.
16: Select the Security Groups and Operational Resources you need to insert into the CloudFormation template from the next two windows.

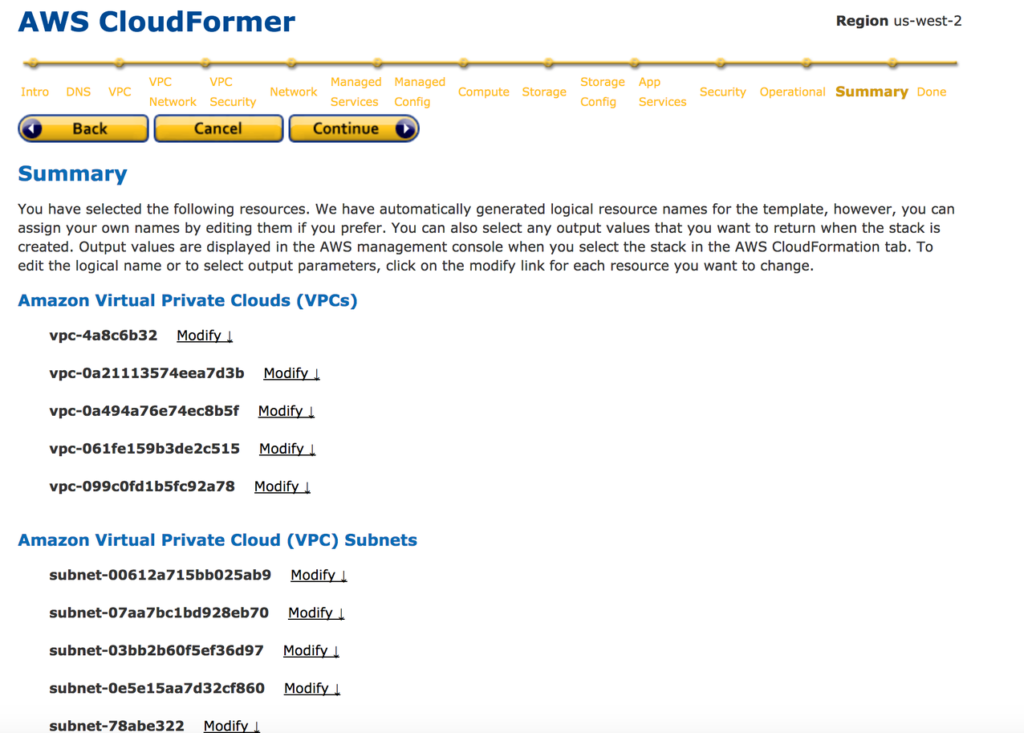
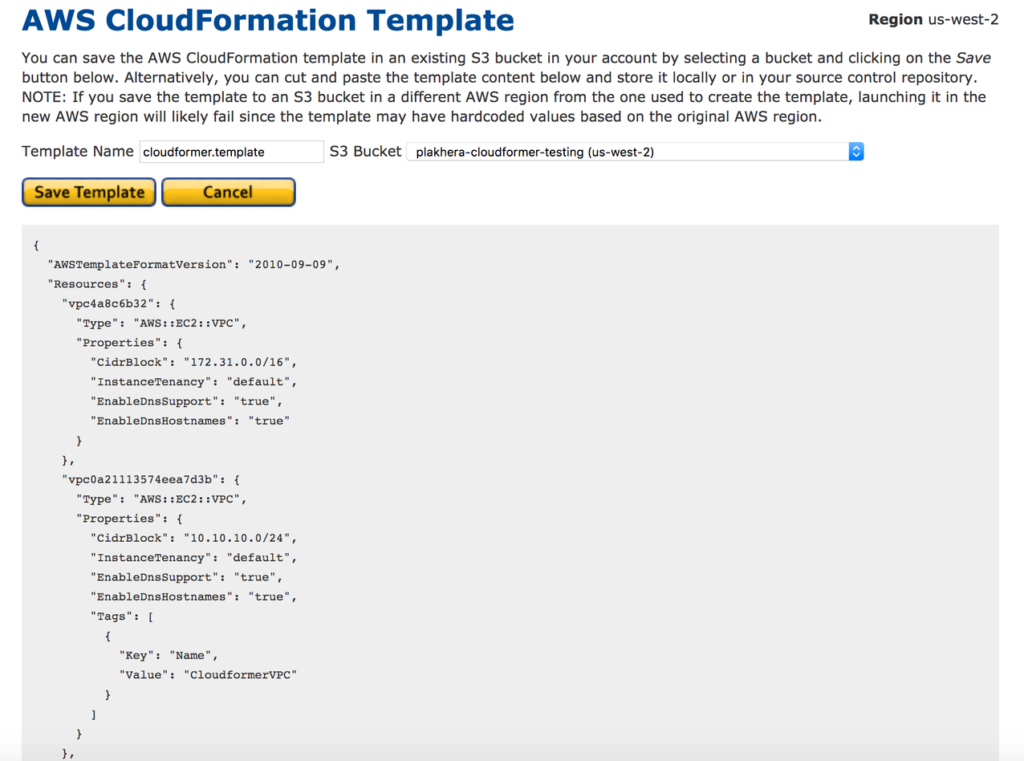
17: Now you are selected all the resources you need to include with CloudFormer template. Provide a Name for CloudFormer Template. Create S3 bucket inside S3 service and select it from the drop down list. Your CloudFormer template will save in this S3 bucket.Save CloudFormer Template.
18: You can access CloudFormer template from the S3 location when you need to deploy it. Also you can change the details in the template according to your requirement.
Reference https://docs.aws.amazon.com/AWSCloudFormation/latest/UserGuide/cfn-using-cloudformer.html
Please join me with my journey by following any of the below links
- Website: https://100daysofdevops.com/
- Twitter: @100daysofdevops OR @lakhera2015
- Facebook: https://www.facebook.com/groups/795382630808645/
- Medium: https://medium.com/@devopslearning
- GitHub: https://github.com/100daysofdevops/100daysofdevops
- Slack: https://join.slack.com/t/100daysofdevops/shared_invite/enQtNzg1MjUzMzQzMzgxLWM4Yjk0ZWJiMjY4ZWE3ODBjZjgyYTllZmUxNzFkNTgxZjQ4NDlmZjkzODAwNDczOTYwOTM2MzlhZDNkM2FkMDA
- YouTube Channel: https://www.youtube.com/user/laprashant/videos?view_as=subscriber