This is the continuation of my earlier post My road to AWS Certified Solution Architect and AWS Certified Security - Specialty Certification
https://medium.com/@devopslearning/my-road-to-aws-certified-solution-architect-394676f15680
YAY I cleared the exam
WARNING: Some House Keeping task, before reading this blog
1: As everyone needs to sign NDA with Docker, I can’t tell you the exact question asked during the exam neither I have GB of memory, but I can give you the pointers what to expect in the exam.
2: As we all know Docker world updates quite frequently, so some of the stuff might not be relevant after a few days/weeks/months.
3: Please don’t ask for any exam dumps or question, that defeats the whole purpose of the exam.
Exam Preparation
- My own effort :-), thank you, everyone, who joined me in this journey
- I highly recommend the Linux Academy Courses to everyone
- If you are just looking to clear the exam, the Zeal Vora course is pretty good but it lacks the in-depth of docker concepts.
https://www.udemy.com/course/docker-certified-associate/
- Dockercon Videos: I highly recommend going through these videos, as they will give you enough in-depth knowledge about each service.
- Docker Documentation: Docker documentation is pretty good, please go through it before sitting in the exam
Once you are done with the above preparation, it’s a good time to gauge your knowledge, check the Docker provided sample question.
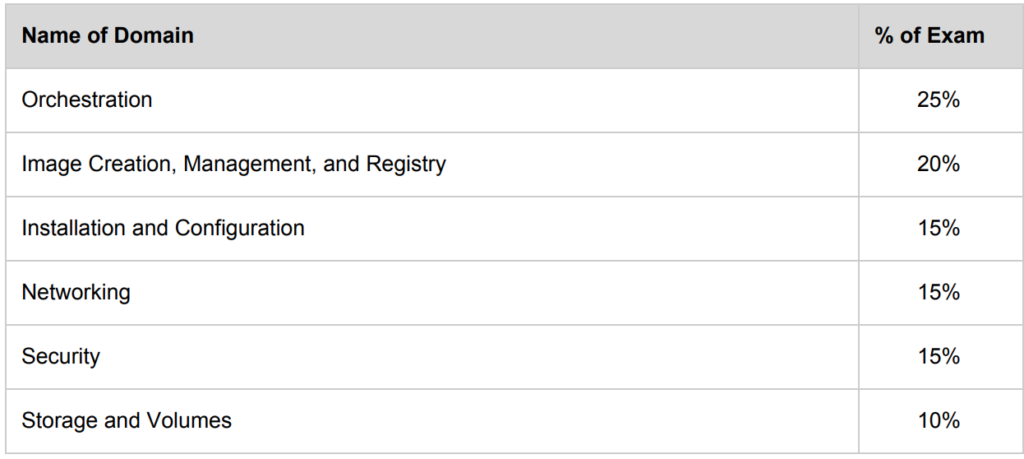
Now coming back to the exam, the entire exam is divided into six main topics.
Based on my experience, you must need to know
- Docker Enterprise & Registry
- Docker Swarm
As they both cover 40% of the exam and will make a difference between whether you pass or fail the exam.
Exam Pattern
- 55 multiple choice questions in 90 minutes
- Designed to validate professionals with a minimum of 6 to 12 months of Docker experience
- Remotely proctored on your Windows or Mac computer
- Available globally in English
- USD $195 or Euro €175 purchased online
- Results delivered immediately
https://success.docker.com/certification
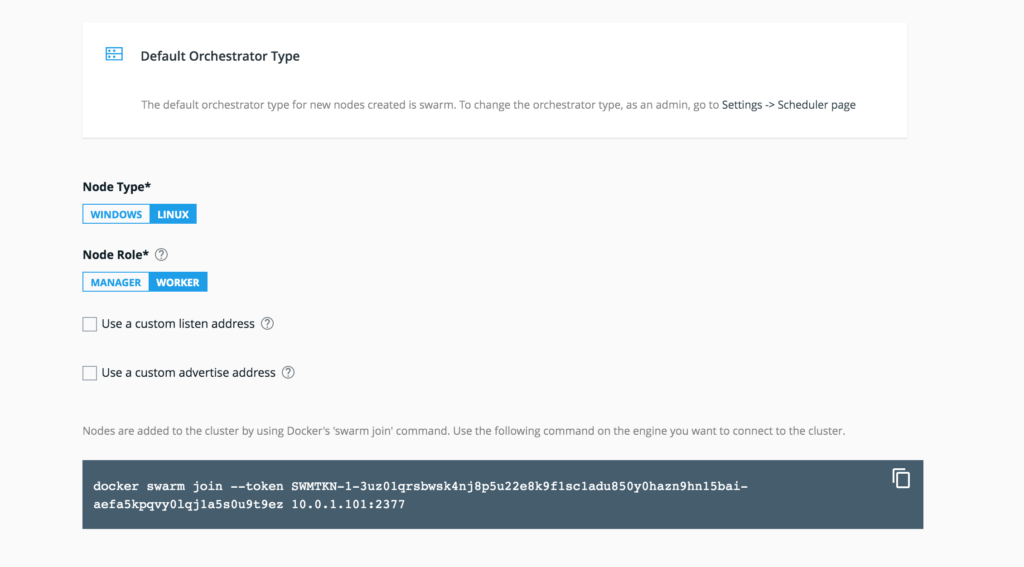
Domain 1: Orchestration 25%
- You must know how to create swarm service
docker service create —name myservice —replicas 3 nginx- Difference between global vs replicated mode
In case of global mode, one container is created in every node in the cluster- Scaling Swarm service and what is the difference between scale vs update(In my exam I see 2-3 question related to this topic)
docker service scale <service name>=5—> In case of scale, we can specify multiple services
docker service update —replicas 5 <service name>—>In case of an update, we can only specify one service
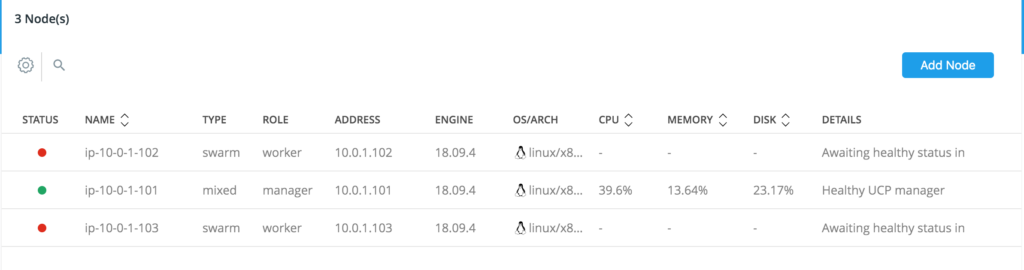
- Draining Swarm node
docker node update —availability drain <node id>
docker node update —availability active <node id>- Docker Stack
docker stack deploy —compose-file docker-compose.yml- Placement Constraints
docker service create --name myservice --constraint node.lable.region==us-west-2 nginx
docker service create --name myservice --constraint node.lable.region!=us-west-2 nginx- Adding label to the node
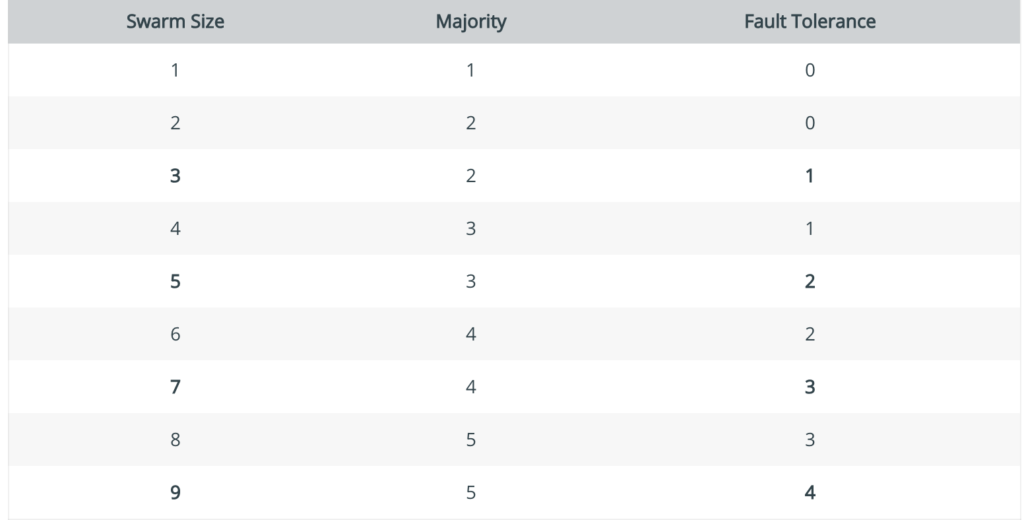
docker node update --label-add region=us-west-2 <swarm worker node id>- Quorum(Remember this formula n-1/2), where N is the number of hosts
- For example, in a swarm with 5 nodes, if you lose 3 nodes, you don’t have a quorum(Please go through this at least once)
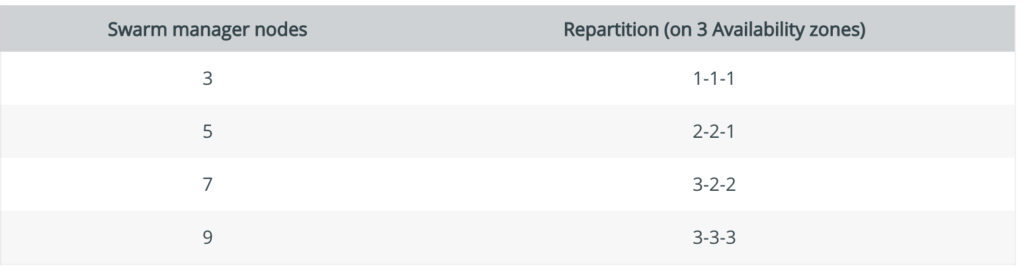
- Distribute manager nodes
In addition to maintaining an odd number of manager nodes, pay attention to datacenter topology when placing managers. For optimal fault-tolerance, distribute manager nodes across a minimum of 3 availability-zones to support failures of an entire set of machines or common maintenance scenarios. If you suffer a failure in any of those zones, the swarm should maintain the quorum of manager nodes available to process requests and rebalance workloads(Please go through this atleast once)
Domain 2: Image Creation, Management, and Registry 20%
- Dockerfile directives
- Difference between ADD(support URL and tar extraction) and COPY(allow copy from source to destination)
- Difference between CMD(we can override it) and ENTRYPOINT(we cannot override it)
- Understand how HEALTHCHECK directive works.
- How to login to a private registry
docker login <private registry url>- How to add Insecure Registry to Docker
To add an insecure docker registry, add the file /etc/docker/daemon.json with the following content:
{
    "insecure-registries" : [ "hostname.example.com:5000" ]
}- How to search an image
docker search <image name>- How to search for an official docker image
$ docker search nginx -f "is-official=true"
NAME                DESCRIPTION                STARS               OFFICIAL            AUTOMATED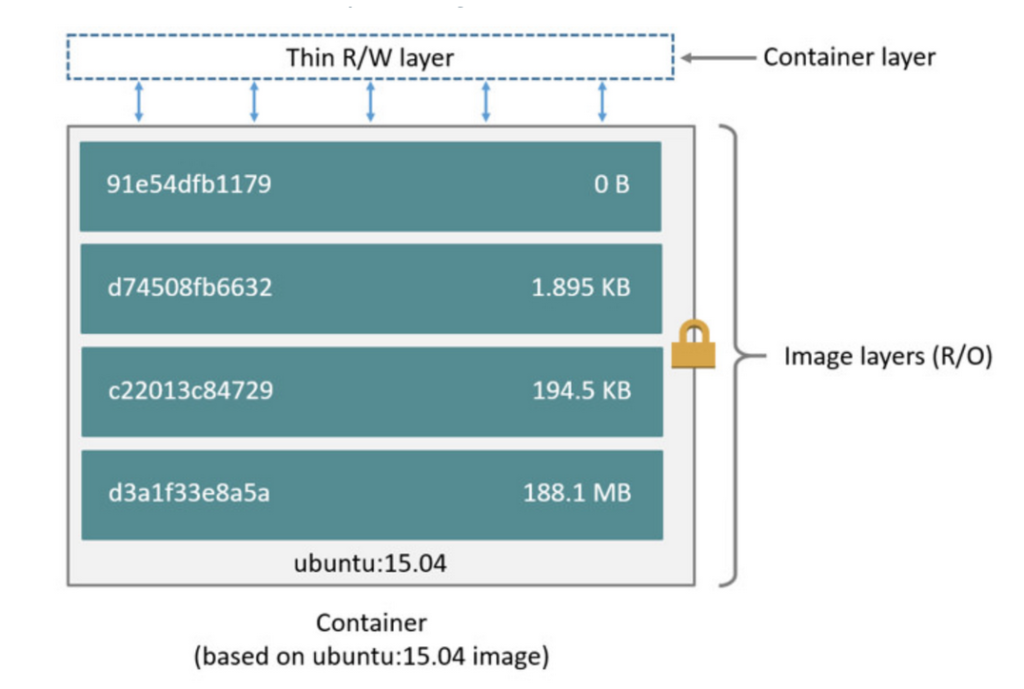
nginx Official build of Nginx. 12094 [OK] - Commit/Save/Exporting an image
docker commit <container id> <image name>
docker save image_name >> image_name.tar
docker export <container_id> >> container.tar
docker load < container.tar

NOTE: When we export the container like this, the resulting imported image will be flatened.- Understand the difference between filter vs format with respect to docker images
  -f, --filter filter   Filter output based on conditions provided

docker images --filter "dangling=true"

      --format string   Pretty-print images using a Go template

docker images --format "{{.ID}}: {{.Repository}}"- Advantage of using multi-stage build
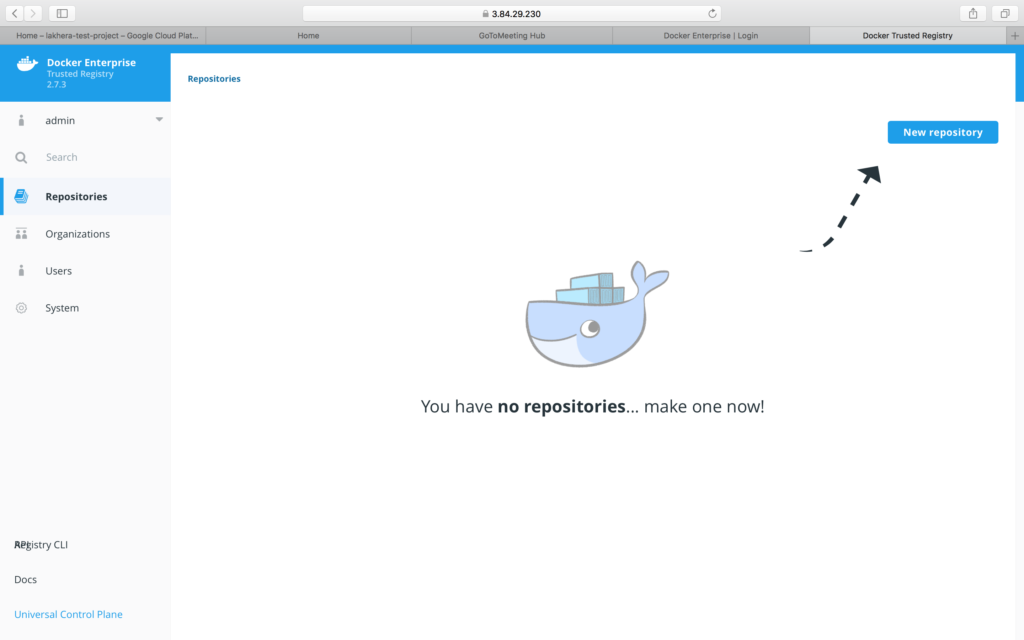
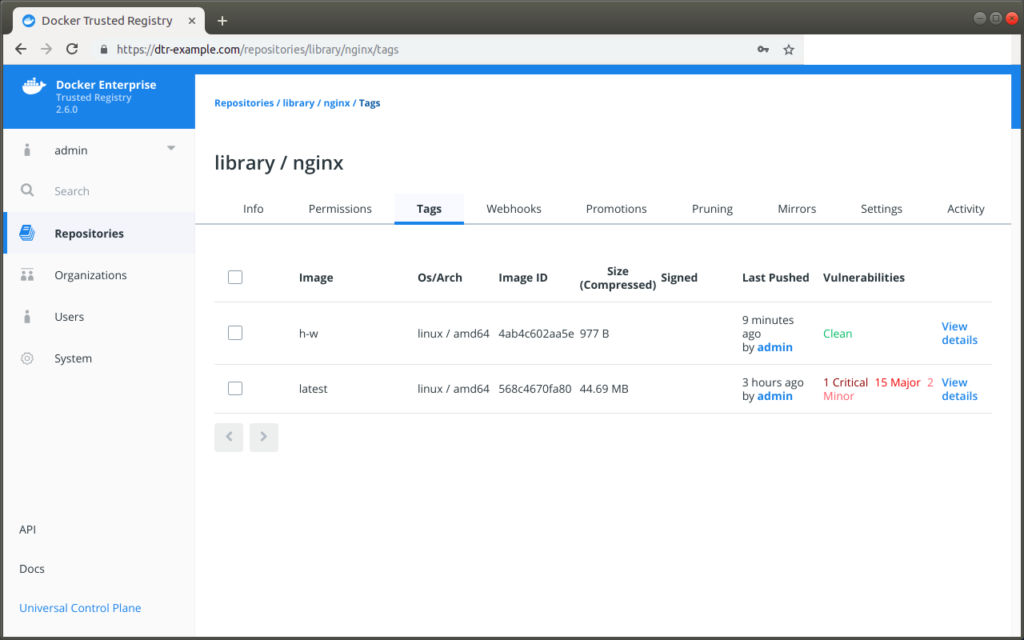
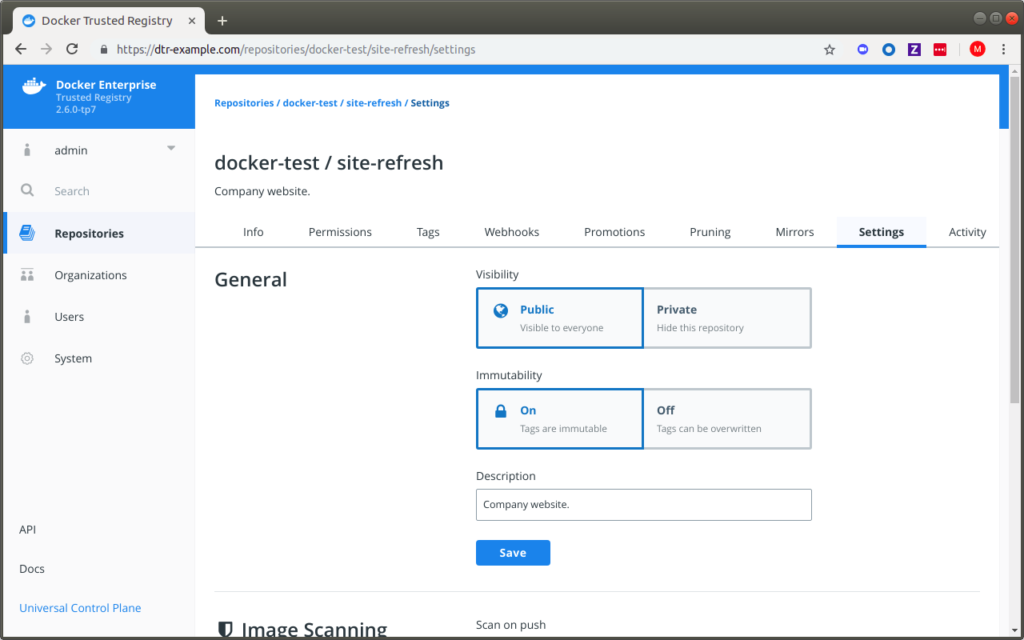
With multi-stage builds, you use multiple FROM statements in your Dockerfile. Each FROM instruction can use a different base, and each of them begins a new stage of the build. You can selectively copy artifacts from one stage to another, leaving behind everything you don’t want in the final image- Prevent tags from being overwritten
Make tags immutable
You can enable tag immutability on a repository when you create it, or at any time after.
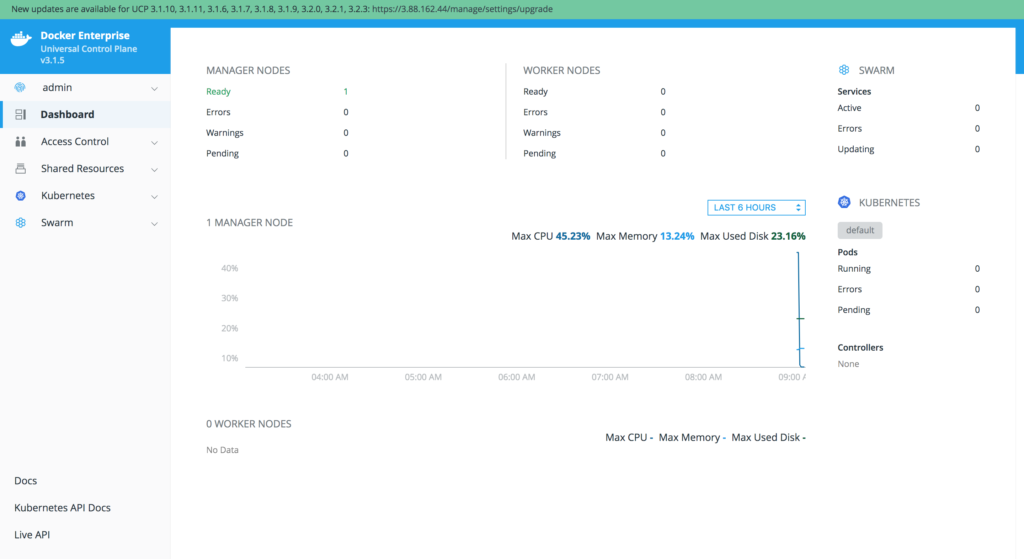
Domain 3: Installation and Configuration 15%
DTR backup process
- When we backup DTR, images are not backed up
- User/Organization are not backed up and should be backed up using UCP
https://docs.docker.com/ee/admin/backup/back-up-dtr/
Swarm Routing Mesh
- All nodes within the cluster participate in the ingress routing mesh
docker service create --name myservice --publish published=8080,target=80 nginxNamespaces
- Make sure you remember which namespaces are enabled by default and which are not
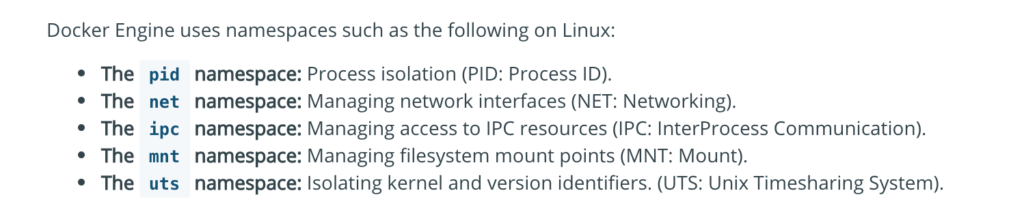
- User namespace is not enabled by default
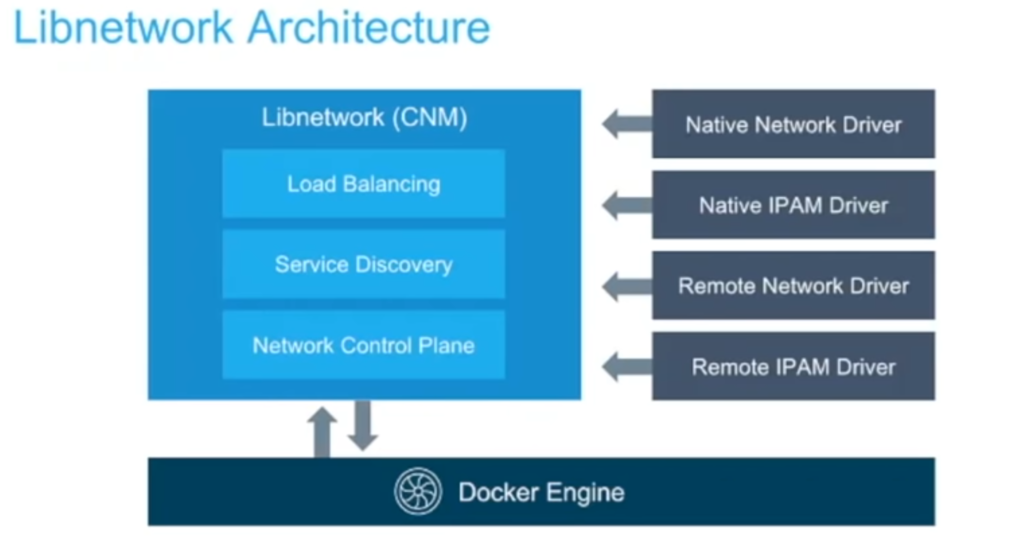
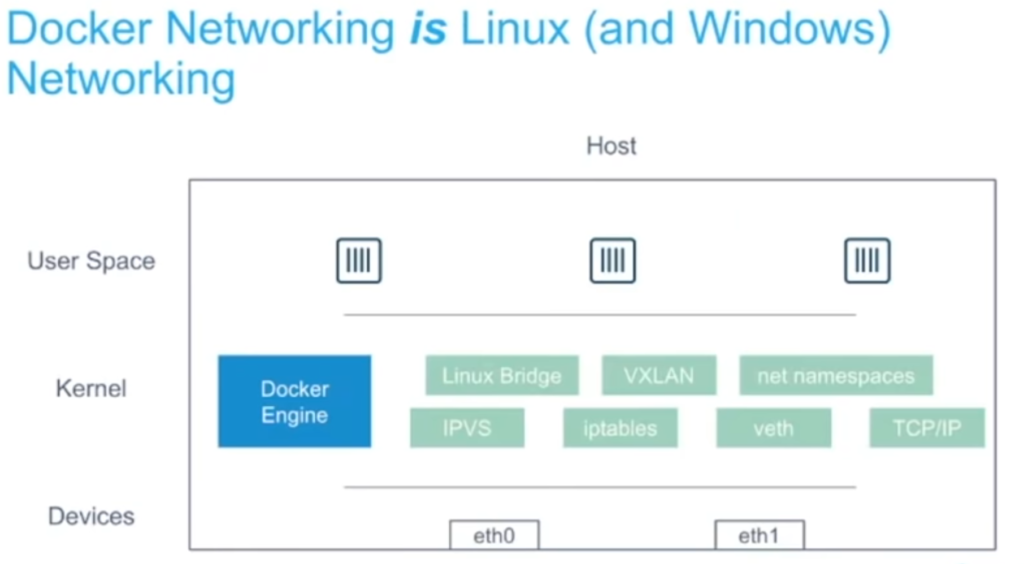
Domain 4: Networking 15%
- Should be aware of Network Driver
Bridge(default)
Host(removes the network isolation)
None(disable the networking)
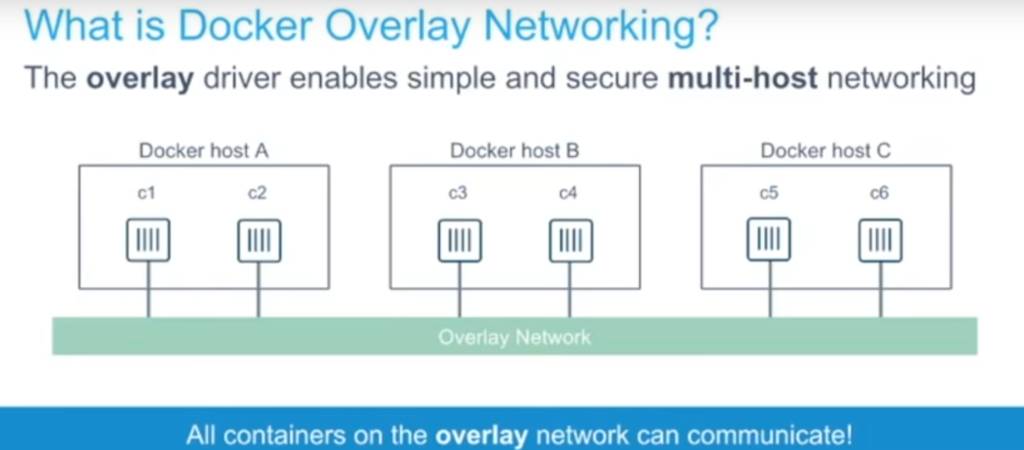
Understand Overlay Network (default in the swarm) and how it works - Why do we need to use the overlay networks?
- How to encrypt the overlay network?
docker network create --opt encrypted --driver overlay my-overlay-network- Difference between -p and -P and how to use its with container as well as with Swarm.
  -p, --publish list                   Publish a container's port(s) to the host
-P, --publish-all Publish all exposed ports to random ports- You can use the -p flag and add
/udpsuffix to the port number
docker run -p 53160:53160/udp -t -i busyboxDomain 5: Security 15%
- This is somehow critically important, make sure you understand the usage of Docker content trust and how to enable it
Docker Content Trust (DCT) provides the ability to use digital signatures for data sent to and received from remote Docker registries. These signatures allow client-side or runtime verification of the integrity and publisher of specific image tags.- Enabling Docker Content Registry
export DOCKER_CONTENT_TRUST=1- Use of UCP client bundles
- Docker Secrets(we cannot update or rename a secret, but we can revoke a secret and grant access to it). Also, check the process to create a secret and use it with service
Step1: Create a file

 $ cat mysecret
username: admin
pass: admin123

Step2: Create a secret from a file or we can even do it from STDIN.

$ docker secret create mysupersecret mysecret
uzvrfy96205o541pql1xgym4s

Step 3: Now let’s create a container using this secret
$ docker service create --name mynginx1 --secret mysupersecret nginx
ueugjjkuhbbvrrszya1zb5gxs
overall progress: 1 out of 1 tasks
1/1: running   [==================================================>]
verify: Service converged- Lock the swarm cluster
docker swarm update --autolock=true- Use of Docker Group
The Docker daemon binds to a Unix socket instead of a TCP port. By default that Unix socket is owned by the user root and other users can only access it using sudo. The Docker daemon always runs as the root user.

If you don’t want to preface the docker command with sudo, create a Unix group called docker and add users to it. When the Docker daemon starts, it creates a Unix socket accessible by members of the docker group.
sudo usermod -aG docker $USER- Docker with cgroups
Docker also makes use of kernel control groups for resource allocation and isolation. A cgroup limits an application to a specific set of resources. Control groups allow Docker Engine to share available hardware resources to containers and optionally enforce limits and constraints.
Docker Engine uses the following cgroups:
- Memory cgroup for managing accounting, limits and notifications.
- CPU group for managing user / system CPU time and usage.
- CPUSet cgroup for binding a group to specific CPU. Useful for real time applications and NUMA systems with localized memory per CPU.
- BlkIO cgroup for measuring & limiting amount of blckIO by group.
- net_cls and net_prio cgroup for tagging the traffic control.
- Devices cgroup for reading / writing access devices.
  -m, --memory bytes                   Memory limit
      --memory-reservation bytes       Memory soft limit
  -c, --cpu-shares int                 CPU shares (relative weight)
      --cpus decimal                   Number of CPUs
--cpuset-cpus string CPUs in which to allow execution (0-3, 0,1)- Understand the difference between docker limits vs reservation
the limit is a (hard limit) and reservation is a (soft limit)
Domain 6: Storage and Volumes 10%
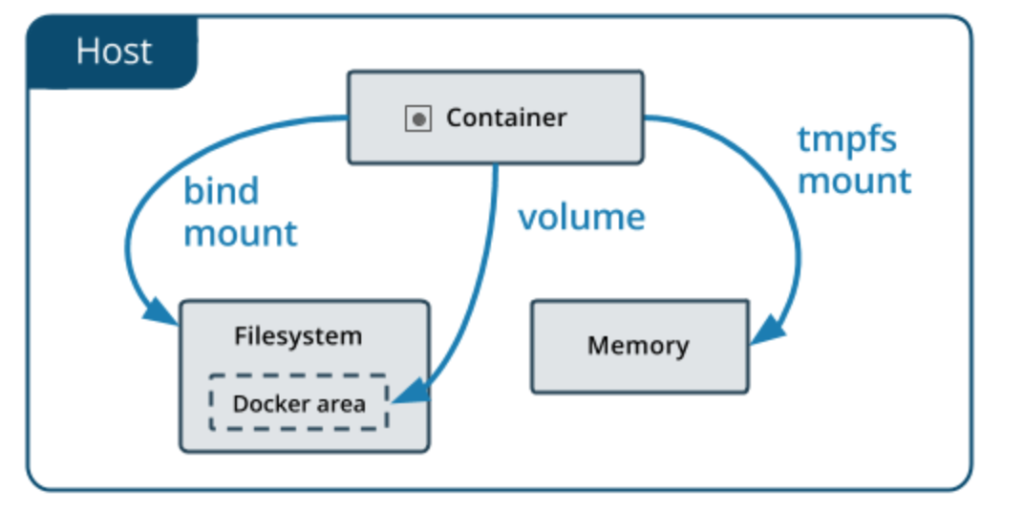
- Make sure, you understand the difference between bind mount vs volume
Bind mounts: A bind mount is a file or folder stored anywhere on the container host filesystem, mounted into a running container. The main difference a bind mount has from a volume is that since it can exist anywhere on the host filesystem, processes outside of Docker can also modify it.- Also please pay special attention to spelling mistakes eg:
-v or –volume –> correct
–volumes –> incorrect (extra s in volumes)
-v, --volume list Bind mount a volume- Just skim through the output of docker volume inspect(field to pay special attention Mountpoint)
docker volume inspect <volume name>

docker volume inspect jenkins_home
[
    {
        "CreatedAt": "2019-07-17T21:08:33Z",
        "Driver": "local",
        "Labels": null,
        "Mountpoint": "/var/lib/docker/volumes/jenkins_home/_data", <----
        "Name": "jenkins_home",
        "Options": null,
        "Scope": "local"
    }
]- We can mount the same volume to multiple containers
- Also, remember that we can –volumes-from to mount volumes from the specified container(s)
--volumes-from list Mount volumes from the specified container(s)- Make sure you understand the difference between device-mapper(loop-lvm(testing) vs direct-lvm(production))
loop-lvm: This configuration is only appropriate for testing. The loop-lvm mode makes use of a ‘loopback’ mechanism that allows files on the local disk to be read from and written to as if they were an actual physical disk or block device

direct-lvm: Production hosts using the devicemapper storage driver must use direct-lvm mode. This mode uses block devices to create the thin pool. This is faster than using loopback devices, uses system resources more efficiently, and block devices can grow as needed- Running –rm with docker run also remove the volume associated with it
docker run --rm -v /mytestvol busyboxMiscellaneous
- Take a look at all the command available under docker system
docker system --help

Usage:	docker system COMMAND

Manage Docker

Commands:
  df          Show docker disk usage
  events      Get real time events from the server
  info        Display system-wide information
prune Remove unused data- How to setup docker in debug mode?
Edit /etc/docker/daemon.json, setting"debug": true. Create this file, If this file does not exist, it should look like this when complete:
{
    "debug": true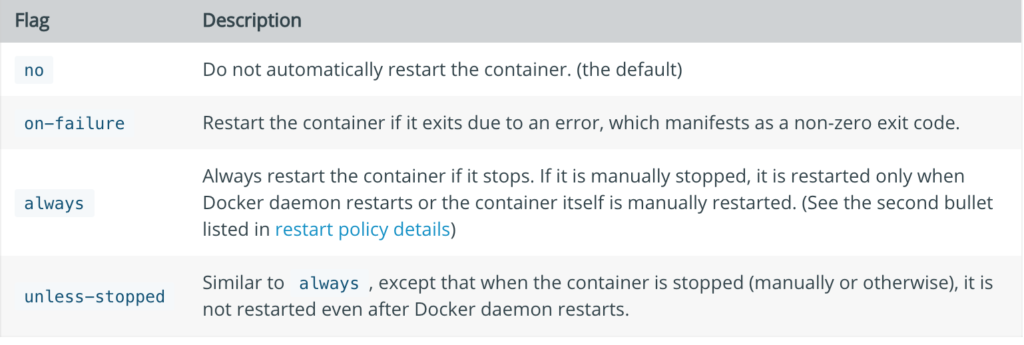
}- Restart Policy
To configure the restart policy for a container, use the --restart flag when using the docker run command. The value of the --restart flag can be any of the following:
- How to copy Docker images from one host to another without using a repository
sudo docker save -o <path for generated tar file> <image name>

sudo docker save -o /home/matrix/matrix-data.tar matrix-data
Once you think you are fully prepared, please try to solve the 9 questions at the end of Docker Certified Associate Guide
Final Words
- The key take away from this exam is, you can easily clear this exam if you know Docker Enterprise Server, Docker Registry as well as Docker Swarm in depth.
- The last exam I wrote was the AWS Security Specialist Exam where a question was scenario-based and some of them are almost one page long, here most of the questions are too the point.
- So keep calm and write this exam and let me know in case if you have any questions.